Using Security Keys for SFTP
To back up data using SFTP, please follow the next instruction:
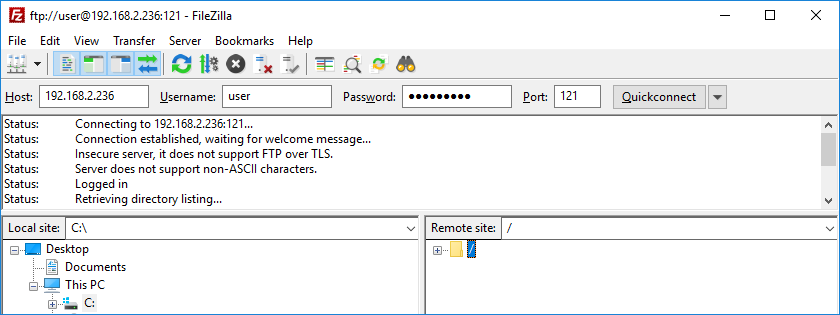
- Check your SFTP connection using any external SFTP client. E.g. in FileZilla, enter the server IP address, your login and password, port number; then press “Quickconnect”.
If connection is successful, continue; else remove connection problems and try the test again.

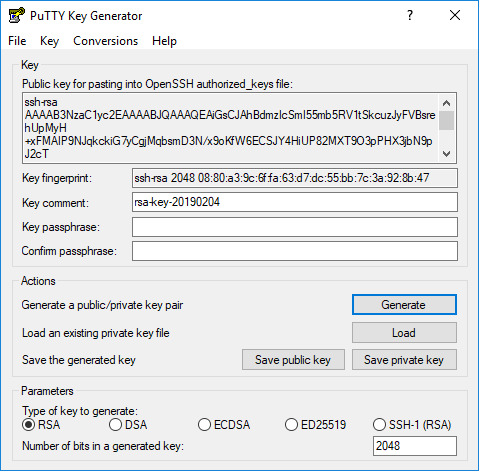
- Next you must authorize in Handy Backup using a pair of private and public keys. For example, you can use the following sequence with the PuTTYgen utility:
- Open PuTTYgen and press “Generate”. Move mouse cursor to and fro in the dedicated area; then save your new keys using the “Save private key” and “Save private key” options.
- Then select “Conversions”. Choose the “Import key” option (File -> Load private key). Copy the generated public key to the “Public key” field in Handy Backup SFTP configuration dialog.

- Now choose “Export open SSH key”. Save the key to the file.
- Open Handy Backup and select SFTP (as the data source or backup vault). Click “New configuration” to continue.
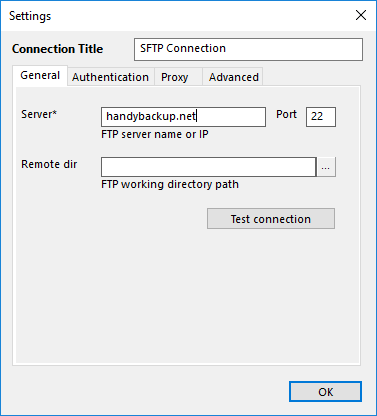
- These are four tabs on the configuration window, called “General”, “Authentication”, “Proxy” and “Advanced”. Let us start with “General” tab. (Other tabs are described in previous chapter.)

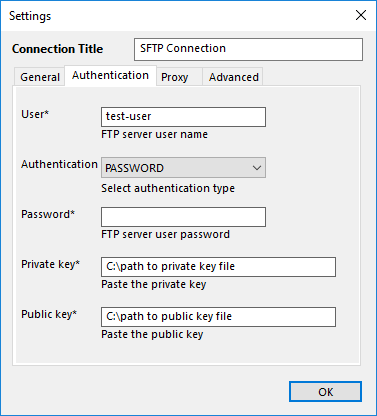
- On the “General” tab, enter the IP address of the SFTP server. Switch to the “Authentication” tab. Enter the user name.

- In the fields for Private Key and Public Key, specify the paths to the files created in Step 1.
- Press the “Test connection” button to validate SFTP parameters.
Note: Different key-generation utilities uses different algorithms for creating private and public keys. If you are following all instructions but can’t connect the SFTP server using Handy Backup, you may use PuTTYgen as default keygen utility.
![]() If you have troubles with SFTP connection please send us E-mail, informing us about your key generation software and about the results of using PuTTYgen, on support@handybackup.net
If you have troubles with SFTP connection please send us E-mail, informing us about your key generation software and about the results of using PuTTYgen, on support@handybackup.net
Tags: Backup to SFTP.