PostgreSQL Restoration
To restore a backup made with the PostgreSQL plug-in, follow these steps:
- On the toolbar, click the New Task icon.
- Select Restore task, and then click Next.
- Browse for the index file (backup.hbi) located in the destination folder. Select it, and then click Next.
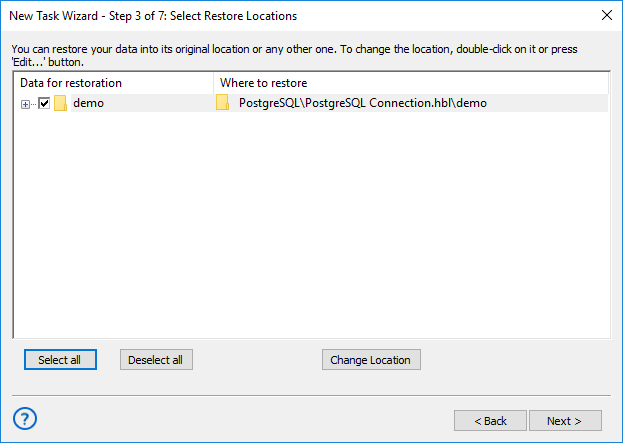
- In the Select Restore Locations dialog, verify the details of restoration.

Selecting PostgreSQL restoration paths
Note: Using the PostgreSQL plug-in you must have a configuration that defines how to connect to the database. If you are restoring the backup on the same machine where it was made, then you should already have it. If you want to restore the backup with a different or fresh installation of Handy Backup, then you will need to create it. To do it, follow these steps:
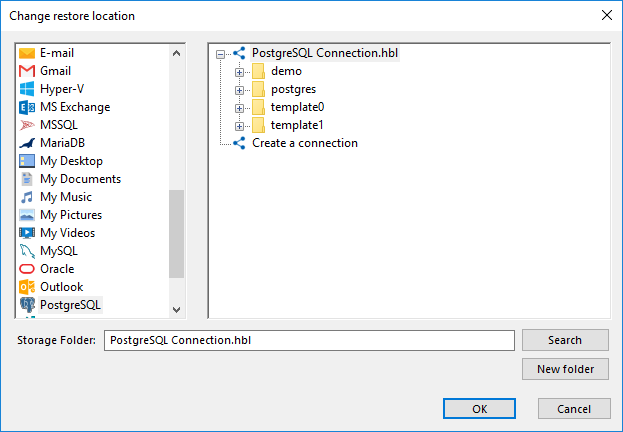
- 4.1. In the Select Restore Locations dialog, select any object (database or table), and then click Change Location. The Change restore location dialog opens.

Changing restore location to create a PostgreSQL configuration
- 4.2. Make sure that PostgreSQL is selected in the left pane. In the right pane, double-click New configuration. This action will open the Settings dialog.
- 4.3. Create a PostgreSQL configuration named identically to the original configuration. To learn how to do it, please see about configuring PostgreSQL plug-in.
- 4.4. After creating the configuration, click Cancel to return to the Select Restore Locations dialog. You don’t need to actually change restore location, only create the configuration..
After selecting the backup data for the restoration, you will need to select the type of restoration, to enter the decryption password (for an encrypted backup), etc. These steps are not specific to PostgreSQL, and you can find the respective instructions in the Restore Task chapter.
Tags: backup restore
Read more about PostgreSQL Backup features.