PostgreSQL Plug-in Configuration
To effectively use the PostgreSQL plugin for backing up or restoring data, you must first create a plugin configuration that defines the connection to your databases.
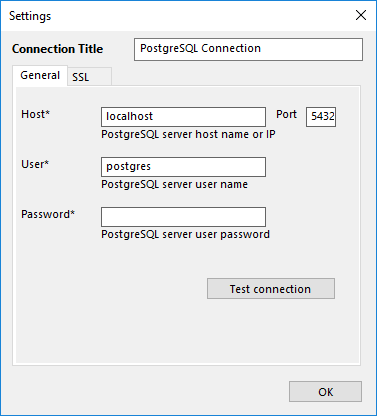
The configuration dialog appears as shown in the image below:

Configuration dialog for the PostgreSQL plug-in.
To specify the configuration for the PostgreSQL plug-in, please follow these steps:

Creating a connection
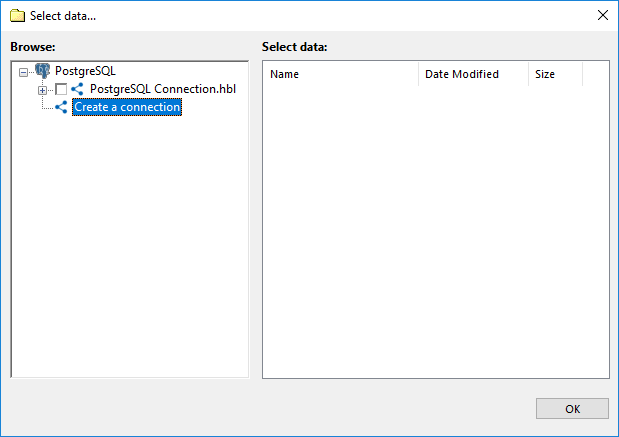
- Click on New Configuration when creating a backup or restore task. This will open the Settings dialog.
- To configure the PostgreSQL connection, complete the fields in the General tab.
- In the Configuration field, enter a name for the new configuration.
- In the Host field, input the hostname or IP address of your PostgreSQL server.
- In the Port field, specify the port number for PostgreSQL. The default port is 5432.
- In the User field, enter your PostgreSQL username.
- In the Password field, enter the password associated with your PostgreSQL account.
- Click Test Connection to ensure all the information is correct and the connection is successful.
- To configure a secure connection, navigate to the SSL tab.
- In this tab, you can select the desired SSL connection mode, specify the path to the root certificate, and provide the paths to the client certificate and its key.
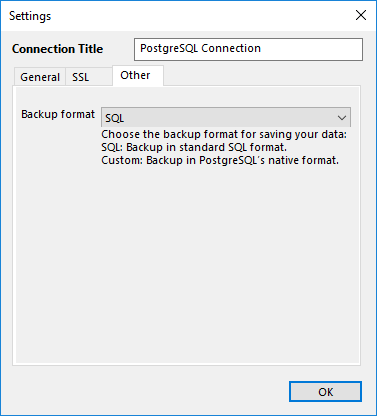
- To choose a backup format, navigate to the Other tab.
- Here, you can select between two backup formats: SQL for SQL-format backups, or Custom for PostgreSQL's native format.
- Once all these steps are completed, click OK.

Configuring SSL mode

Configuring Other mode
To configure the PostgreSQL plug-in, the user must have sufficient privileges to perform the following actions:
- For creating backups, the PostgreSQL user must have privileges to execute SELECT statements on each database and table to be backed up.
- For restoring data, the PostgreSQL user must have full privileges to drop databases and tables, and to restore them from scratch.
Note: For PostgreSQL version 10 and later, Handy Backup must be used in its 64-bit version. You can select the appropriate bit depth during the installation process. For detailed instructions, refer to the bit depth selection guide.