Step 3: Select Restore Locations (Restore Task)
This page describes the third step of creating a restore task with the New Task Wizard.
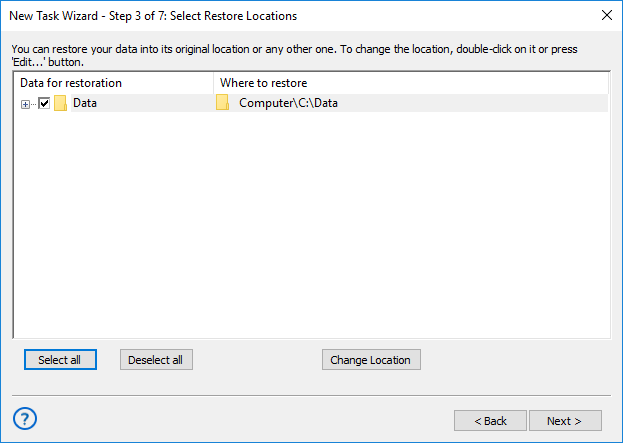
On the third step of the New Task Wizard, you can select data for restoration and where you want to it. In the window, you can see all backed up files and default restoration paths.
By default, all backed up data is restored to its original location. If you want to restore the entire backup, skip this step by clicking Next.

Performing Selective Restoration
If you want to restore only specific files or folders*, follow these steps:
- Expand the tree view, and browse for the data you want to restore.
- Check or uncheck the boxes, so only the desired objects are selected. You can use Select all and Deselect all buttons.
*Note: In these instructions, “files and folders” may also mean databases, tables, HDD partitions, and other objects. To learn more, please see Plug-in File Systems...
Changing Location of Restoration
To change restoration location, follow these steps:
- Browse for a folder or file which you want to restore to a different place, and select it.
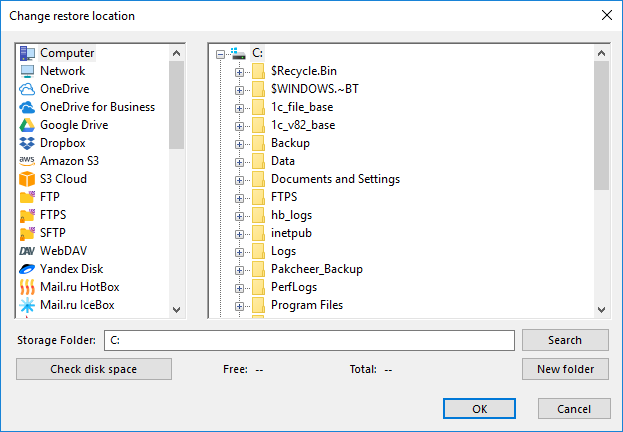
- Click Change Location. The Change restore location dialog opens.

The Change restore location dialog consists of two panes, Data Sources and Restore Location.
- The Data Sources pane contains data sources.
- The Restore Location pane shows files and folders you can select as a restoration locations.
Technically, data sources are plug-ins. To make use of this or that plug-in, you need to have an appropriate license. During the trial period, you can use all plug-ins without any limitations. After registration, the list of plug-ins will be limited, respectively to the edition you register. To learn more, please refer to Registration...
When selecting a new restore location, you need to select a compatible plug-in. For example, you can’t restore common files and folders to MySQL or Disk Image plug-in.
Some of the plug-ins are configurable. For example, to restore tables of a MySQL database, you will need to create the respective MySQL configuration (specify server, login and password). To learn more, please refer to Plug-in Configurations...
- Select a new restore location. If you are changing path for a folder, then you need to select a folder. To change restore location for a file, select a file. Click OK.
- Repeat steps 1-3 for each file you want to restore to a different place.
When selected data for restoration and restore paths, click Next.
Tags: restore backup