Groups
This guide outlines the processes for adding and modifying task groups to make it easier to manage backup, recovery, and synchronization processes. It also explains how to assign a task to a group.
Adding and Managing Groups
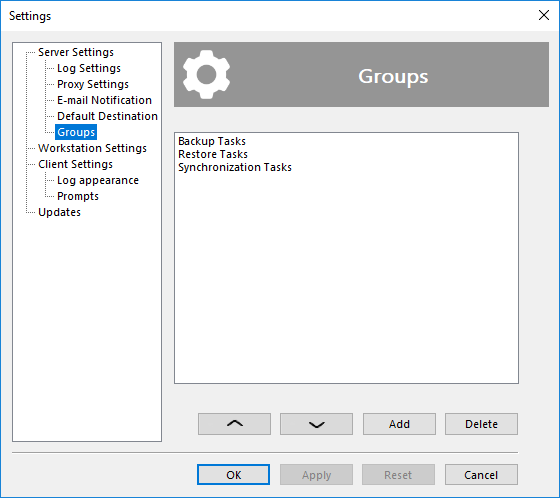
To access the settings menu, click the gear icon on the top toolbar of the program, then select the "Groups" tab.

In this section, you can create or delete groups. You can rename a group by right-clicking on it.
Keep in mind that group names are limited to 23 characters.
You can also rearrange the order of the groups by selecting a group and using the up and down arrows.
Organizing Tasks into Groups
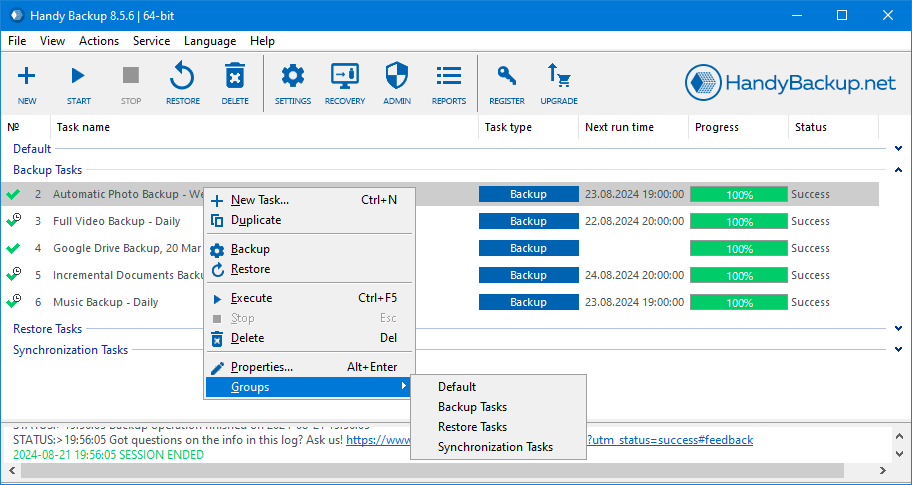
By default, all tasks are placed in the Default group. To add a task to another group, go to the program's main screen, find the task you want to move, and right-click on it. In the context menu that appears, select the "Groups" option. Hover over this option to open a submenu with a list of available groups (to create a new group, refer back to the beginning of this guide), and select the desired group.

Remember that the group assignment function is only available for one task at a time, so if you select multiple tasks, changes will only apply to the task where the context menu was invoked.
When a group is deleted, all tasks that were in it are moved back to the Default group.
On the main screen, you can collapse or expand a group by double-clicking on its name or by clicking the arrow to the right.
