WebDAV plug-in
WebDAV (Web-based Distributed Authoring and Versioning) is a special secure network-level protocol that runs over the HTTP. WebDAV provides generic access for different online storages such as private clouds based on OwnCloud technology.
Prerequisites
WebDAV can perform basic and advanced file object-operations on a remote server, and also has built-in support of simultaneous-users working. This allows you to use WebDAV for backups in the rather same way as the local computer. You can make copies in two directions: backup from WebDAV share and backup to WebDAV.
Using WebDAV Plug-in
To make a backup via WebDAV, please follow the next instruction.
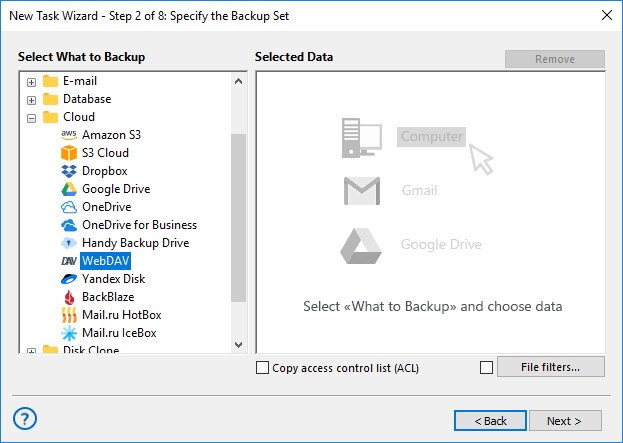
- Go to Step 2 of New Task Wizard and select the WebDAV plug-in in the Cloud group.

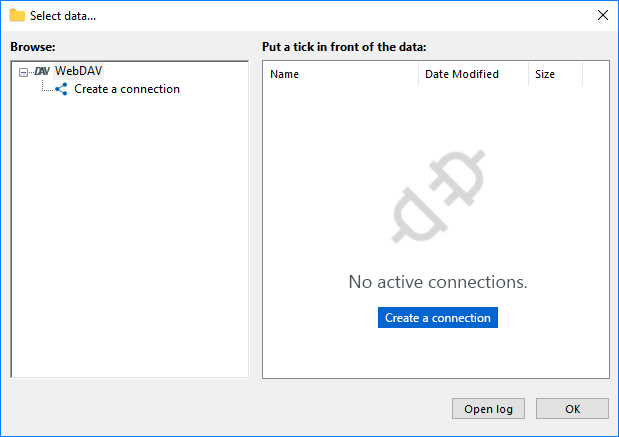
- Click Create a connection… string to open a connection setup dialog.

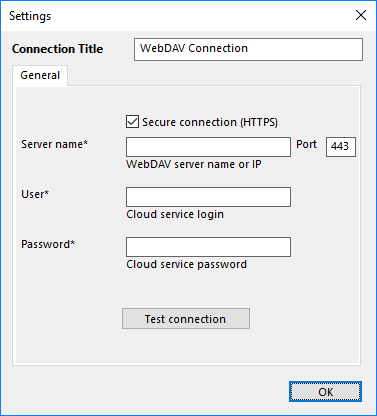
- Configure the connection via WebDAV by providing appropriate connection parameters.

-
- Enter the name or IP address in the Server Name field.
- Set up the port. Default port for WebDAV is 443 (over SSL) or 80.
- Enter your User and Password into corresponding fields.
- After finishing, click OK. Return to the plug-in window.
- Click onto a connection name to enter the Select data… dialog. Here mark all data that you plan to back up.
- When you finish, click OK and continue creating a backup task according to this Manual.
Now you can use WebDAV connection for backing up your folders and files.
Utilizing WebDAV as Storage
To do it, select WebDAV on Step 3 instead of Step 2. Create a new connection to your cloud resource as described above if you need it. After connecting, select a folder to store your backups and continue creating a task as usual.
Restoring from WebDAV Clouds
Presumably, to restore some data from WebDAV, you already have a connection to a cloud, although you can establish it as described before during creating a recovery task (e.g., after re-installing Handy Backup). Select WebDAV on the Step 2 of recovery task creation, and find a file backup.hbi inside it.
Next actions for setting up a recovery task have no differences for using the WebDAV plug-in. Please refer to this Manual to create a restoration task as usual.