Database Plug-in
The Database plug-in allows backing up and restoring different databases through the use of standard ODBC (Open Database Connectivity) drivers.
Prerequisites
To use the plug-in, you need to have the respective ODBC driver installed on your system.
A Note about Versions
You may need a 32-bit version of Handy Backup to work properly with some databases, including versions of MS Access etc. To ensure that the plug-in will work properly, please force the 32-bit installation of Handy Backup!
File System
File system of the plug-in is organized as follows:
- Folders display different ODBC data sources. Folders have no attributes.
- Files correspond to database tables. Files have no attributes.
When you open a folder, the program connects to the respective ODBC data source. If it is for some reason not valid (e.g. if you change a password), the program opens a configuration dialog.
See instructions on adding ODBC data sources below.
Adding ODBC Data Sources
To add a new ODBC data source, follow these steps:
- Open Control Panel, then go to System and Security, and then go to Administrative Tools.
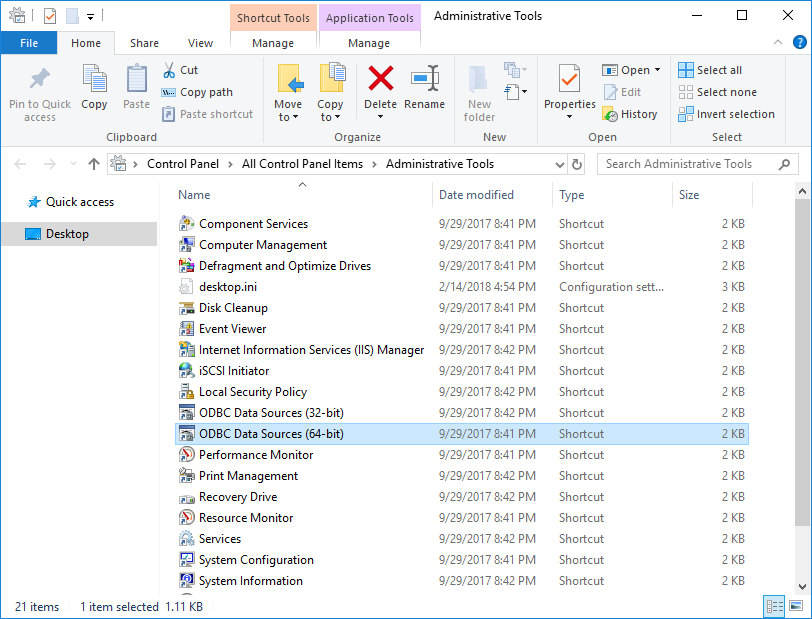
- Double-click Data Sources (ODBC). The ODBC Data Source Administrator opens.
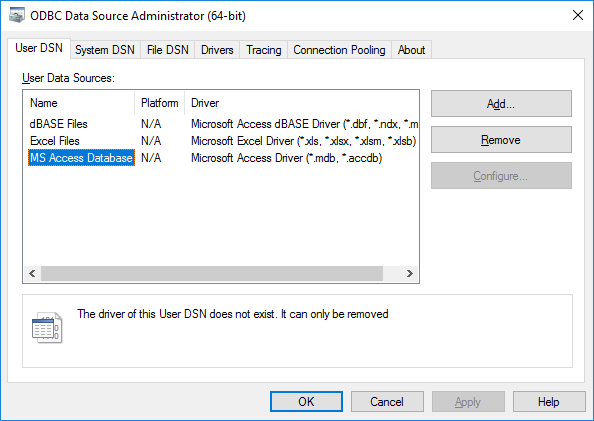
- In ODBC Data Source Administrator, click Add. The Create New Data Source dialog opens.
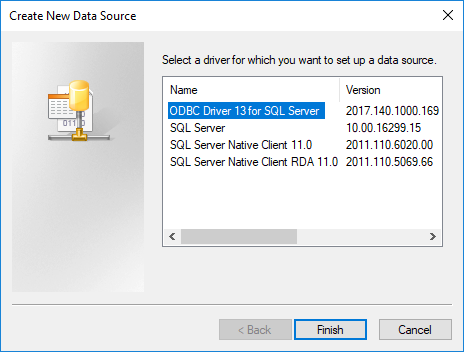
- Select an ODBC driver, and click Finish. The ODBC Data Source Configuration dialog opens.
Note: The above instructions are valid for Windows 7, and may slightly vary for other systems.
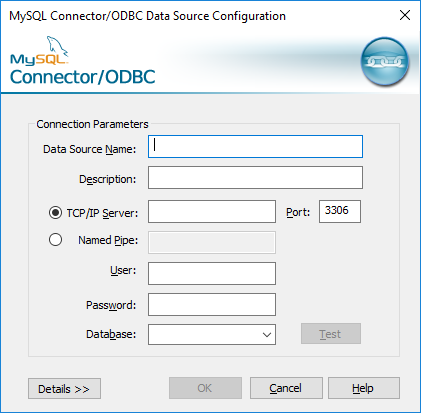
Then you need to configure a data source for your database. For example, the MySQL configuration dialog looks as follows:
Format of Backup Files
The Database plug-in creates files that are named similarly to the names of tables. Each file stores data in a binary format provided by the ODBC connector.
Backing Up
To create a backup task with the use of the Database plug-in, follow these steps:
- Open New Task Wizard.
- Select Backup task, and then click Next.
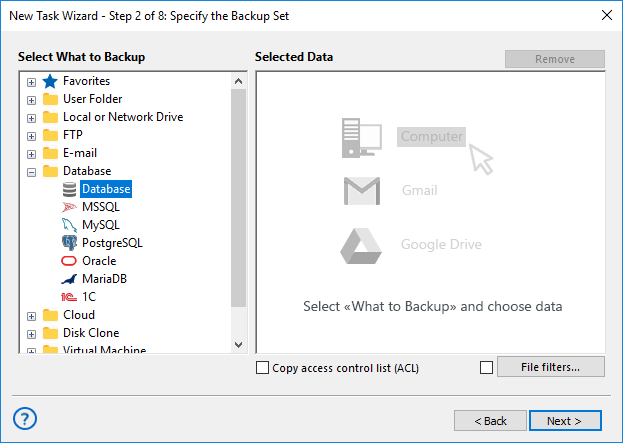
- In the Data Sources pane, click on the Database plug-in in the Database group. The Select data... dialog will open.
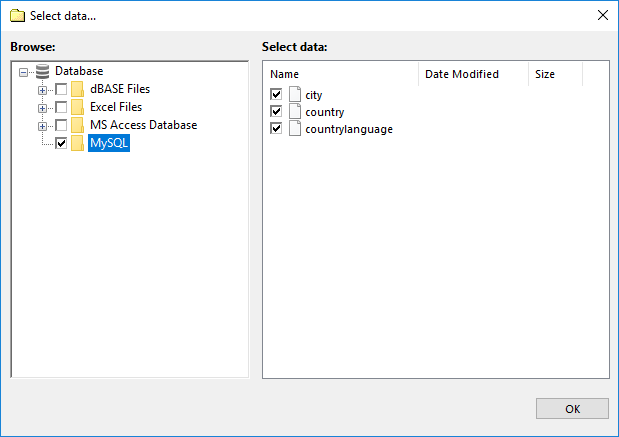
- Check the boxes next to files and folders (tables and ODBC data sources) that you want to backup.
- When finished the selection, click OK. Selected data appears in the Backup Set pane of the New Task Wizard.
Next steps are common for all backup tasks and are not specific to the Database plug-in. For detailed instructions on creating backup tasks, refer to Backup Task.
Restoring
To restore a backup made with the Database plug-in, follow these steps:
- Open New Task Wizard.
- Select Restore task, and then click Next.
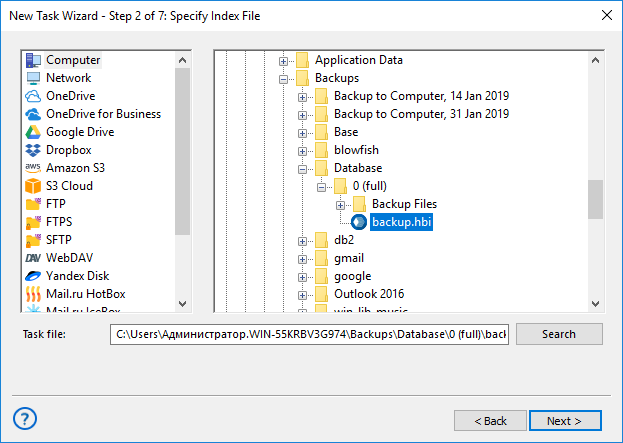
- Browse for the index file (backup.hbi) located in the destination folder. Select it, and click Next.
For example, if your backups are stored on a local hard disk, then you need to select Computer in the Storage Destinations pane to the left, and then browse for backup.hbi in the Index File Selection pane to the right.
- In the Select Restore Locations dialog, verify details of restoration.
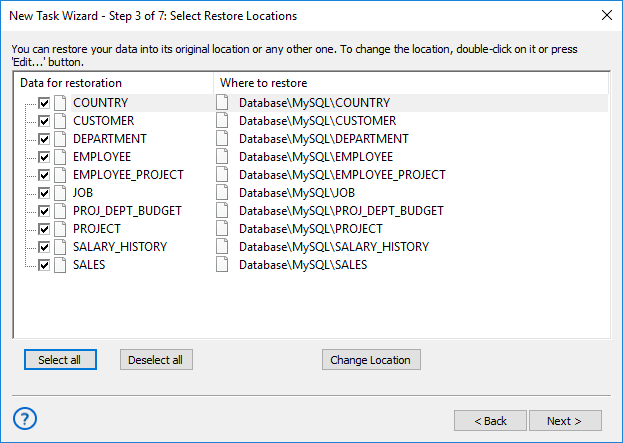
In this dialog, you can uncheck data that you don’t want to restore. At present, backups made with the Database backup plug-in can be restored only to their original locations, and you can’t change it.
In the next steps of the New Task Wizard, you need to specify restoration options and name the tasks. They are not specific to the Database plug-in. To learn more, please see Restore Task.