Installation and Configuration for Debian 12 and 11
The workstation is distributed as a portable version in the form of an archive with data, before installation it is necessary to download the archive from the link:
- for Debian 12 - dl.handybackup.net/handybackup-debian-12-workstation.tar.gz
- for Debian 11 - dl.handybackup.net/handybackup-debian-11-workstation.tar.gz
System Requirements:
- Version of Debian 12 or Debian 11;
- 64-bit processor with x86-64 architecture;
Availability of the following package:
- zlib1g
- librsync2
Installing the package: sudo apt install -y zlib1g librsync2
Basic Requirements:
- To use the workstation (network agent), you need the server version of Handy Backup.
- The Handy Backup Server Network control panel, installed on a machine with the Windows OS.
- Handy Backup Server Network solution is required for using the workstation.
- The server and coordinator computers must be configured to accept incoming network connections from the workstation.
- The workstation computer must be configured to accept connections from the server computer.
- Machines must be on the same local network.
Installation and Configuration of the Network Agent
- Retrieve the data from the archive.
- To generate the configuration file, launch the workstation by navigating to the following location:
* Note: Make sure that the unpacking path of the archive contains only Latin characters to avoid display issues in the interface.
<extraction_location>/HandyBackupWorkstation8/bin/HandyBackupWorkstation8
- To edit the configuration file of the workstation, navigate to:
<extraction_location>/HandyBackupWorkstation8/var/HandyBackup8/Settings/workstation.hbl
and input the connection details into the following lines:
- WorkstationHost - the IP address of the computer where the workstation is running.
- Name - the display name of the workstation when connecting to the coordinator.
- CoordinatorHost - the IP address of the computer where the coordinator is located.
- CoordinatorPort - if the coordinator's port hasn't been changed, leave the default value.
- To apply the new configuration file settings, restart the workstation located at the following path:
<extraction_location>/HandyBackupWorkstation8/HandyBackupWorkstation8/bin/HandyBackupWorkstation8
Updating or Reinstalling the Network Agent
- Create a backup of the configuration file in advance to preserve its current settings.
- Delete the HandyBackupWorkstation8 folder.
- Repeat the workstation installation process using the new archive.
- Replace the configuration file with the backup from step 1 or reconfigure it from scratch.
Installation and Configuration of the Network Agent via Terminal
- Download the data archive and unzip it:
tar -C <extraction_location> -xzf <path_to_archive>
Replace <path_to_archive> with the path to your downloaded archive and <extraction_location> with your desired location for unpacking the workstation.
- Generate the configuration file by launching the workstation:
cd <extraction_location>/HandyBackupWorkstation8/bin/HandyBackupWorkstation8
- Edit the workstation's configuration file using a text editor like nano:
<extraction_location>/HandyBackupWorkstation8/var/HandyBackup8/Settings/workstation.hbl
Adjust the following lines in the file to match your settings:
WorkstationHost=<station_IP_address>
Name=<displayed_station_name>
CoordinatorHost=<coordinator_IP_address>
CoordinatorPort=<coordinator_port>
- Save your changes and exit the text editor.
- To apply the new settings, restart the workstation:
cd <extraction_location>/HandyBackupWorkstation8/bin/HandyBackupWorkstation8
Updating or Reinstalling the Network Agent via Terminal
- Create a backup copy of the configuration file in advance to preserve its current settings.
- Delete the previous HandyBackupWorkstation8 version:
rm -r <extraction_location>/HandyBackupWorkstation8
- Reinstall and configure the workstation using the new HandyBackup version.
- Finally, replace the configuration file with the backup created in step 1, or reconfigure it according to your preferences.
Creating a Backup Task for the Linux Network Agent from the Windows Central Panel
- Select the “Create Backup” task type* and click 'Next'.
* Note: In this example, a task is created in Simple Mode. If you require more advanced program features, such as choosing the backup type, configuring pre/post-task execution, and so on, you should check the “Advanced Mode” option.
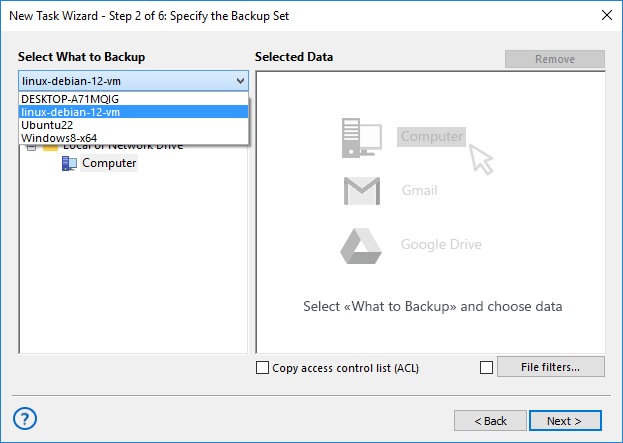
- On step 2, choose the connection to the Linux network agent (workstation):

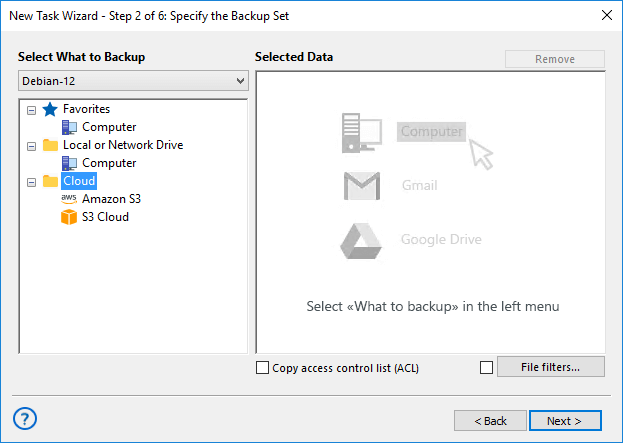
- Select the files for backup (currently, the available plugins for a Linux workstation are Computer, Amazon S3 and S3 Cloud):

- On step 3, choose the location where backups will be created.
- On the next step, select compression and encryption options.
- On step 5, set the task schedule.
- On the final step, provide a task name and click 'Done'.
Setting Up a Data Restoration Task for the Linux Network Agent from the Windows Central Panel
- On the first step, select the 'Restore' task type.
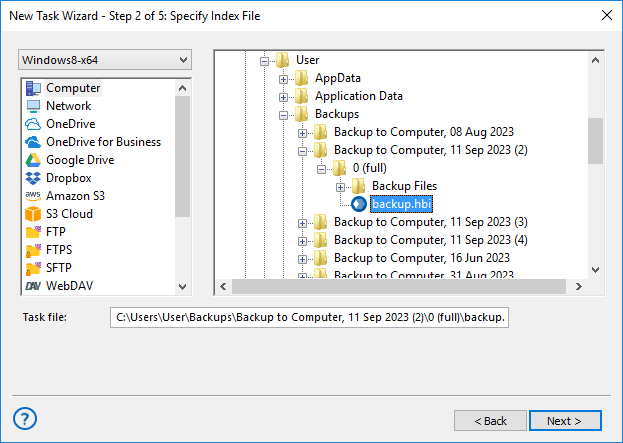
- On the second step, specify the location of the '.hbi' file for the recovery task:

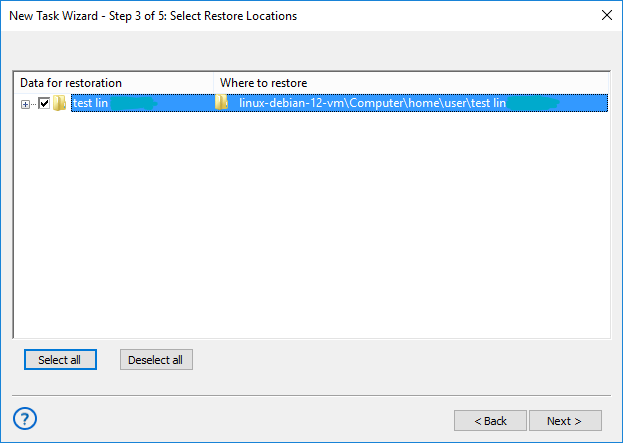
- On the next step, choose the files for recovery:

- On step 4, select the recovery type.
- On the final step, provide a name for the backup task and click 'Done'.
Related pages: Network Agent Troubleshooting, Server Backup Solution