Step 4: Advanced Synchronizing Settings (Synchronize Task)
This page describes the fourth step of creating a synchronize task with the New Task Wizard.
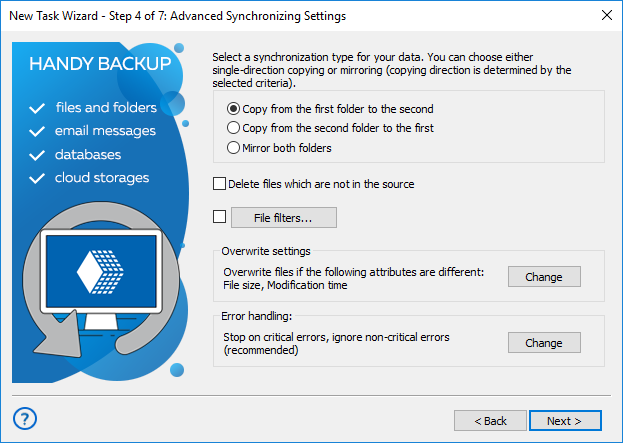
On the fourth step of the New Task Wizard, you can select type of synchronization and set up filtering. Advanced users can also change comparison settings and error handling settings (read below).
Type of synchronization determines the direction in which the program must copy contents.
- Copy from the first folder to the second. This option is used to synchronize contents of the second folder with the first one.
For files with identical names, the program compares attributes, according to comparison settings (see below), and overwrites all different files.
- Copy from the second folder to the first. This option is used for synchronizing the first folder with the second one.
Files with identical names are compared, different files are overwritten.
- Mirror both folders. This option performs two-way synchronization of two folders.
For files with the same names, you can choose priorities: copy newer, copy older, copy smaller, copy larger, or skip.

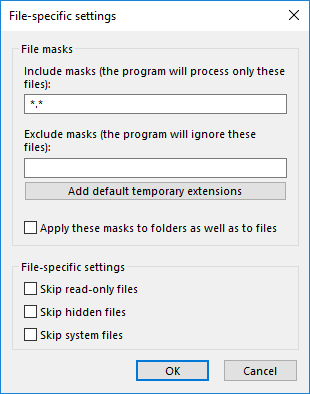
If you want to synchronize files of specific type only, you can enable filtering. To do it, click File filters... The File-specific settings dialog opens.
In the File-specific settings dialog, you can specify filtering options that will be checked for each file being copied.

Include and Exclude masks: Filling up these fields enables you to synchronize only files matching to a specific file mask. Use * (asterisk) as a wildcard, separate different masks with | (vertical line). For example, *.docx|*.xslx will select documents with any names and of Microsoft Word and Microsoft Excel only.
Overwrite Settings
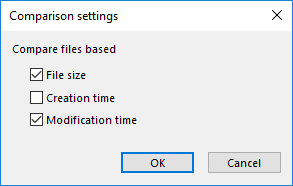
By default, when running synchronization, the program compares attributes of files in the first and in the second folder, and copies only files of different File size or Modification time. This behavior is task-specific, and can be changed in Overwrite settings. To change it, click the Change button.

Error Handling
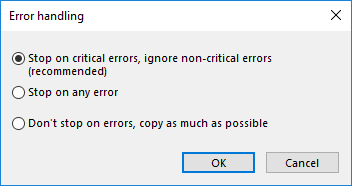
Error handling lets you set the program’s behavior when it encounters an error:
- Critical errors happen, for example, when you try to synchronize an FTP folder, and enter a wrong password for authorization.
- Non-critical errors are one-time errors that are not specific to the entire synchronization. For example, the “Access denied” error may be a result of a conflict with another application, and running the same task again will back up the same file successfully.
You can choose whether the task must stop on any error, stop only on critical errors, or don’t stop on errors at all.

If there are any errors during synchronization, the task will end with an Error status.
When finished with this step, click Next.
Next steps are common for all tasks. See the following chapters:
In this section: